Showing posts with label Valentine. Show all posts

Friday, October 13, 2017

Trailer Rally and Vintage Market!

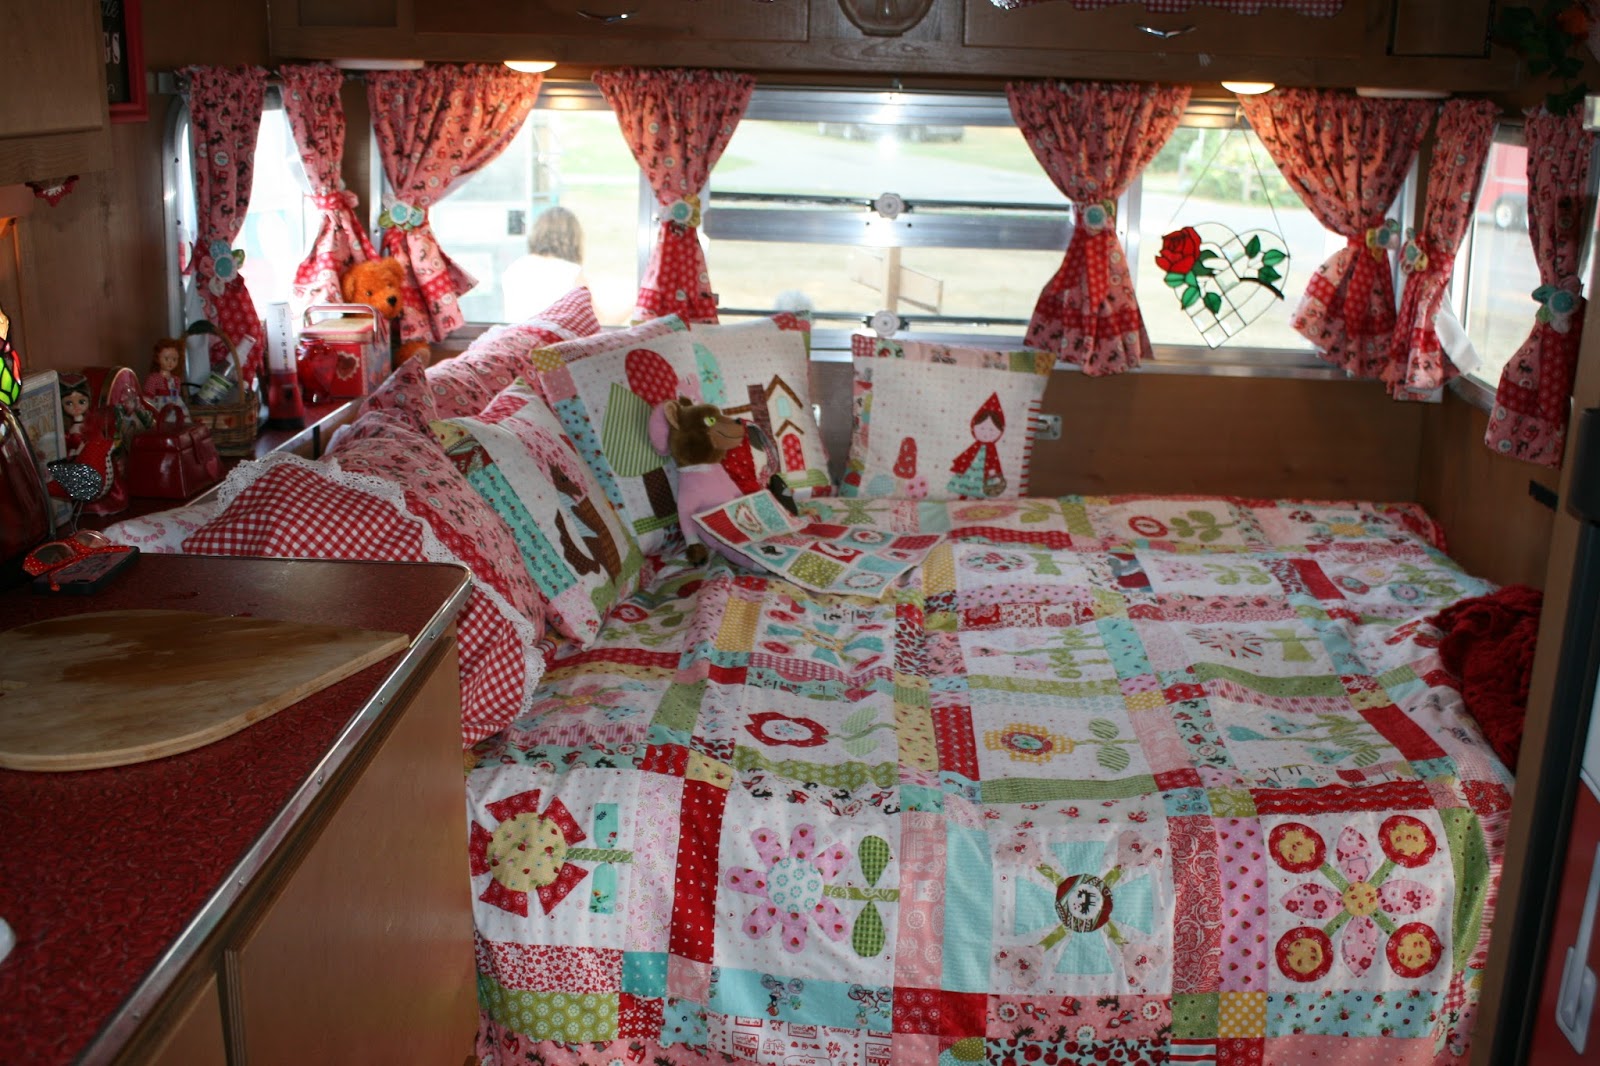
Hey guys, long time no post, yet again! But thought I would post an update!  I went to a Vintage Market and Trailer Rally a few weeks ago and thought i would share some of the photos.  I added a new theme to my trailer for this year with pink and red, with a Red Riding Hood theme.  The curtains were pink with Red Riding Hood tumbled as the design by my now favorite designer Stacie Lest Hsu!  I hand appliqued the comforter cover using the pattern and templates from Lori Holt's quilt along that she did last year from her blog: Bee in My Bonnet! Using many fun colors for a bright and cheery quilt to go along with the theme! 

I created some new applique designs for the pillows to enhance my Red Riding Hood them, modeling the characters a bit from the actual fabric to coordinate well. I made the doll kit that came with the fabric line and found a wolf in my toy stash! 

In the first photo, you can see my newly built dinette. I had my builder take out the original gaucho bench and using the original wood, recreate it into a dinette for two. He made a new little table, with red boomerang laminate (we decided to redo all the laminate at this time as well to all red rather than the original gray!)  Then I made new cushions to size. I created the cushions so they can still all lay down on top of the collapsible unit and make into a small bed! Now i can leave my big bed made up at all times and still have a place to sit and have coffee or a snack! 

My vintage "Toast it with Roses" sign, it is reversible and i still love it as a fun accent and it camouflages the TV behind it.  My Middie Blythe dressed as Red Riding Hood and her vintage Wolf help continue the theme!

The new red laminate added such a beautiful touch and made it so colorful!

Found this fabulous vintage looking fan at Lowe's.  Red Riding Hood salt and pepper shakers for the theme

Here you see a Red Riding Hood tea pot to continue the theme, along with my new retro looking coffee pot and toaster!

Now to the exterior!
Welcome to Oma's Trailer, Sign i made the morning of the rally! Haha. Had this one in my head for a year!
Welcome table, had the water jug filled, some grateful guests enjoyed the lemon water I filled this with!

Mr Wolf guarding the door!


My fall display by the tongue fence! I had so much fun creating this!  I had found a garden flag imprinted with a vintage Red Riding Hood flag!

My table display with hand made fabric roses and vintage melamine/melmac dishes! 

Here is the entire exterior!  I had such a great time with my decorating this year! I was so excited when I was told I won first place for the "people's choice favorite trailer" award! The prize was a bag full of hand made goodies from various restaurants around Marshall. So many yummy things~

Well there ya go, a an update on one of my adventures!! Till next time, have a beautiful day!


Saturday, May 21, 2016

Spring Can Opener Glamping trip with the Mitten Kittens

oh lort...what a fun trip it was....hold on to your hats...lots and lots of photos for your veiwing pleasure and eye candy fix...

so here we go with the tour of my glamping set up!
Side table with my vintage looking gumball machine, hand made fabric roses and vintage rose glasses!  A beautiful vintage table cloth to cover the table...and one of my flower boxes..


my mushroom Gnome house....unfortunately when i took it down Friday night i broke the wire in the hub..so i was not able to set it up for the main glamping day on Saturday for the tours...*sigh* oh well!

the Gnome theme went wild...i had so much fun! Notice the gnome hats on the flamingos..a boy with beard and girl with braids...lol

my star...my 4 foot tall boyfriend...he was a hit!  

Side view with my hand painted rug and details. the awning turned out lovely as well....i opted to not put it up Saturday due to the crappy weather and wind....it sure made the look!

the front view! I think the polka dots took over..lol


 some inside looks...as you are going in...i actually did tuck in the blanket after i snapped this photo...oops...
the bed all made up...it is so bright and cheerful!


my spice board and details of the sink area 


my kitchen area:

 the back bench...of course a trio of dolls had to come with me...
 my fridge with my decal...petticoats and dress ready for the big day!

camoflage for the TV!


beautiful view looking out!


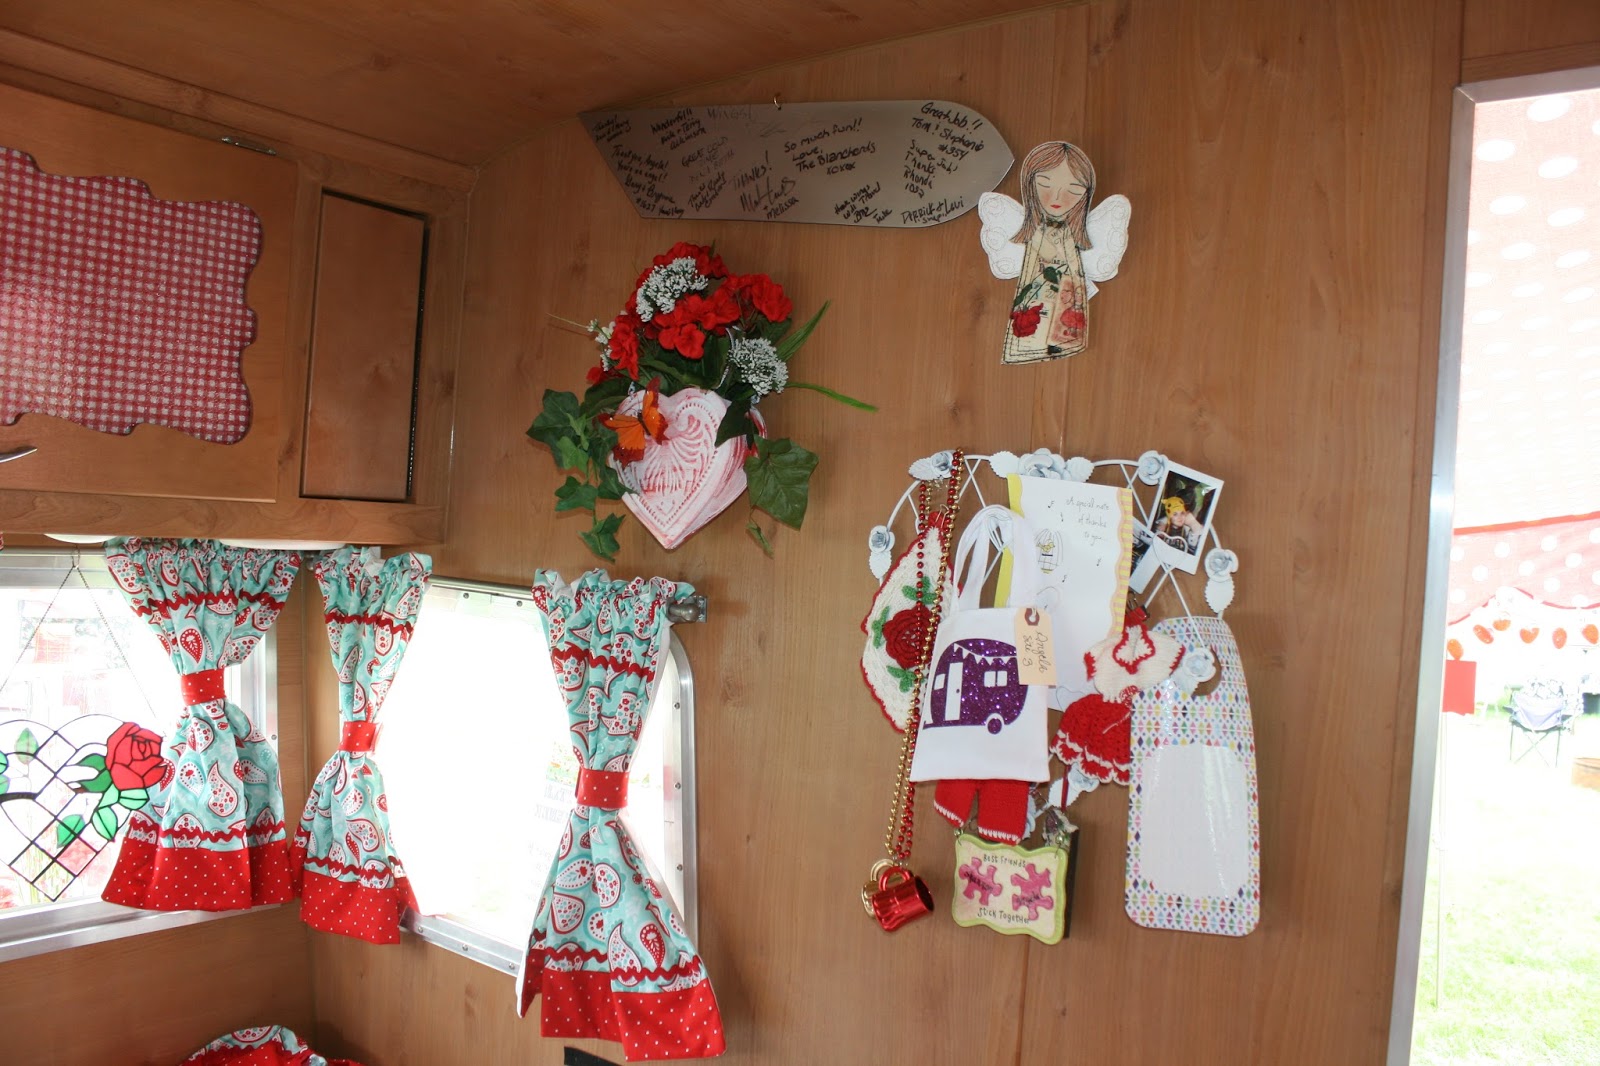
the wall near the door!


still a favorite...my stained glass rose heart..


i had a wonderful time.  We estimated that we ended up with close to 700 people touring the trailers that weekend.  We really weren't expecting that kind of response...woah nellie!

Here i am on Saturday with my matching Polka Dot Gnome Dress...the gnomes are from my favorite fabric designer Michael Miller....the dress actually came first..from last year...
Truck and Trailer...hehe...the looks i get going down the hiway are hilarious!

 and last but not least...i won 3rd prize for the Glamping! Award given by the amazing Thrifter Sisters!


Thursday, April 21, 2016

quickie little post...My backsplash for My Funny Valentine...

had fun adding this quick backsplash yesterday. Done with Flexipixtiles that i found on Amazon!..it only took about half an hour to install. The photos don't do it justice...think Christmas ornaments..the deep red and shiny!


T

Tuesday, March 29, 2016

New Projects this week! Glamping we will go!

Well here we go...it is going to be a rather long post...but lots of eye candy for you all!  Well after Christmas i get bored and start dreaming and looking for new things...and shopping happens too.  I had found this adorable mushroom play house. My current trailer theme as you know is all about the Gnome Love...so how could i resist this play house! I plan on bringing it with me to set up for the glamping trip when i go in May!  AND...when i went to get my pickets to build my picket fence (below)...look who had to come hom with me! My 42" gnomie...he is still nameless...just Gnomie for now.. I had him bukled in the front seat on my way home....i did catch a couple of men catch sight of him and laugh! I wonder what kind of looks i will get on the highway when i go camping?...haha!
so here you see...said pickets and lumber i bought for my fence....the project begins!


I wanted something unique and all my own. After extensive pinterest research and coming up short...i took matters in my own hands and came up with this idea. I traced a picket on the pointed end..then drew a heart shape at the top of that. Then i measured from the new "picket" top (not the heart...just the shape that was the same as the other end) Split that in half and  cut the pickets at the halfway mark.  I then used my scroll saw and cut out the hearts and the new "top" shape...  

here they are laid out..ready to be screwed onto the treated lumber 2x3 cross brace.  I had cut that 4" longer than my tongue measurement of my trailer!


here the first panel is screwed together. I had to buy one more picket the next day because i spaced them closer together than i originally planned!


so before i started painting the pickets...i paused and cut out two more projects...so i could paint one of them while waiting for the picket paint to dry.  The other one i will work on next!!

a little hint of the next project....I am re--using some wood and also some buckets from out in the garage...i love repurposing things when i can!


here the two halves of the fence are put together..the end is not exactly attractive..so i spotted this can to hang there and make a floral arrangement in to hide the end a bit!


here it is!! Painted and with the floral arrangement...farther down on this post you will see the trailer with the flower boxes installed as well!

I also was able to get some of the little details done today too..Pigs can fly of course...  I mounted some hooks i have had for a year..finally..lol


Here i used clear mirror clips to hook the wire for my flowerboxes on to. Originally i was going to use picture hanging hooks. I had cut the triangle off but realized the hole was way too small for the screws from the window frame. When i came back up and looked in the organizier again..i spotted these clear clips and the screws fit perfectly! Woohooo!  love those serendipitous moments!


 here you can see the flower box I mounted under the bathroom window...so cute!

The end of my trailer...two boxes and my darling fence..did the happy dance today when i got it all put together!

just inside the door...my cute and fun hooks!!  I found these at Michaels hobby store!


Another one off the to-do list! Ever since i got my traler these clear doors drove me nuts.  You can not store anything inside there with out seeing it.  Even when i folded the blankets and linens neatly it still looked messy.  So i took one of the clear panels out, used it to measure out two pieces of cardboard. I covered each with red gingham fabric that i used that darling Shasta trailer duct tape with..i knew i would use it eventually! haha...and then i used tiny nails at each corner to hold them in place.  I took each door off by unscrewing the hinges from the frame...and then remounted them..took maybe 15 minutes!


I also finally mounted my knife magnet....it was too long.so i came up with the idea of turning it at an angle..looks Like i meant to do it that way...hehe


Well that is it for the moment..lots more in progress!! I hope you enjoyed my pictures and descriptions! I having a blast here!  hehe  big hugs to you all!